1

portable car mat

Hello all!

This is my first post on my shiny new computer – it’s so pretty!!  I got a job a couple of weeks ago, after 5 months of being a ‘lady of leisure’, and decided that a new computer was a necessary step. Still getting used to it, and missing some features from my last computer, but it’s definitely a major step up! Anyway, I’m pretty sure you don’t care about my computer!

Today’s project is actually a really recent one.  I know – that never happens! But I’m pretty excited, cuz this one turned out great.

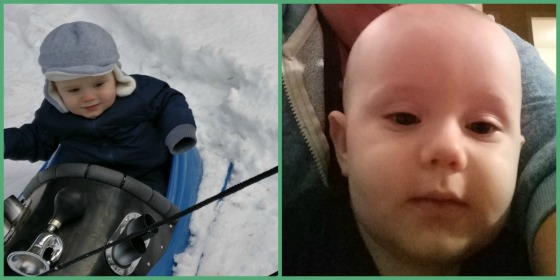
If you were reading two weeks ago, you’ll have seen that it was my gorgeous nephew’s first birthday. Here he is, just so you can see how gorgeous he is:

isaac

I wanted to make something really special for his first birthday, and I saw the most amazing idea on ‘Ragamuffin’s’ blog. Check it out here. I loved the idea instantly, but apparently I don’t read very carefully, because she very obviously outlines the amount of work involved in such a creation. I didn’t really get that…

BUT, I did finish it more than 24 hours before his birthday… Let’s say 26 hours, probably! And that was mostly because we had family staying that weekend so I needed to be done.

Anyway, here is my version of the car mat:

img_20170204_202010_edited

img_20170204_201922_edited

img_20170204_201905_edited

picmonkey-collage

img_20170204_202107_edited

As you can see, it has a school, a playground, a pond, some skyscrapers, houses, a trimg_20170204_202239_editedee with a rope swing, and a gas station. I even included a round-a-bout, seeing as we just moved back from the UK. It also has parking spaces for 6 Hot Wheels sized cars. I bought him a bigger car, seeing as he’s too young for hot wheels, and probably doesn’t really understand ‘scale’ yet, anyway. When being transported or stored, the mat, along with the cars, can be snapped together, rolled up and tied, ready to go wherever! Did you notice I even stitched his name on the ties?

I did also notice that a lot of people were asking Jessica from Ragamuffin for a pattern, and she didn’t have one. To make my life easier, I kinda made patterns for all the cutouts. Maybe one day, I’ll combine them into a pdf or something like that. We’ll see…

Anyway, I’m pretty happy with the way this project turned out! Let me know what you think.

-Jamie

2

purple purse

Hey, happy Thursday to all of you out there in blog-land!

I can’t believe that I didn’t share this with you ages ago! Maybe I did – correct me if you’ve seen it before.

So, when I go fabric shopping, half of the time I have an idea what I’m doing, and buy specific fabric, and half of the time I buy ‘the cutest fabric ever’ then have ideas for it. This was the latter.

I found this super cute purple spotty fabric that I had to have. Didn’t know what I was going to do with it, but I did need it, so I bought just a meter.

When I got home, I started scrolling Pinterest to think of exciting things to do with it – I decided it would make a good bag. Unfortunately, I didn’t know much about fabric at the time – the fabric that I bought is cute, but isn’t really thick enough to structure a bag. But it’s still cute!

I followed a pattern from Melissa Esplin, and although the fabric wasn’t right, I still have a super cute, usable bag. Good enough for me!

dsc_8483

-Jamie

0

memories of travelling

Morning!

So awhile ago, I was trying to think of ways to remember the trips that we’ve gone on. I’m not talking the little trips to nearby areas, but the bigger trips, and specifically for us, exploring Europe. I thought about doing scrapbooks for each of the trips that we’ve gone on, but let’s face it – scrapbooks take forever and then mostly sit on the shelf.*

*I realise this isn't what happens in everyone's world, but it is most certainly the case in mine.

I decided that a good way to remember the trips was to use an online service to make photo books – simpler, quicker, cheaper and smaller! I’ve printed two or three so far and am really happy with them.

But this didn’t help me with the little souvenirs I love to pick up. The problem with little souvenirs is that if they sit on the shelf looking pretty, they simply gather dust. And I hate dusting. So here’s my solution:

dsc_7525

I bought a couple of Ikea shadow boxes and have gathered ‘stuff’ to put inside a couple of frames. I only bough two frames at first, because I know I won’t be able to get these ones forever, so I decided I needed to get different frames to create a random frame collage. I chose to use smaller frames (the one above is 9 inches square) because I didn’t want them to take up too much space. I’m hoping to create a larger one and to put things from all of our trips within the UK in it.

For now, I’ve done one frame, but I have everything I need to create one or two more. If people would stop having birthdays and wanting Christmas presents… 😉

This is the frame from our trip to Thailand back in 2011 – we went on our first anniversary.

dsc_7550

And the best part – I can see everything, but the dust can’t get in. A quick duster across the frame and it’s clean! So please with this idea, and can’t wait to share more of my trip frames with you!

-Jamie

0

flapping bird

Morning! Just a quick post to share with you today!

Back in 2012, when I moved into my last classroom, the teacher’s cupboard was FULL! I was told that I couldn’t get rid of much of the stuff, but by Easter, decided I needed to go through it. I spent 2 whole days of my holiday there, going through the cupboard from top to bottom. And you would NOT BELIEVE the junk I found! I was throwing out stuff dating back to the 1990’s. Turns out that both of the teachers in the room before me were a bit hoarder-ish. I am too, but with MY stuff, not other people’s!

phone-2015-04-08-002

Anyways, I tell you all of this because of one thing that I found, which was destined for the garbage. This flappy bird:

dsc_7571


He didn’t look very good, was faded and missing an eye, and had been badly painted in places. I asked what I should do with him, and was told to thrown him out, so instead, I took him home to give him a new lease on life.This is what he looks like now:

flapping-bird

Not amazing, granted – I’m NOT an artist. But he’s bright, colourful and will being cheer to any classroom decor. I’m not sure if I ever shared it with you all, but a couple of years ago, I made a vine curtain to give my reading corner some personality. I took a cheap, mesh curtain (courtesy of Ikea) and painstakingly attached some vines to it. The bird is perfect to go along with it!

classroom

So there you go – a flappy bird for my rainforest corner. Next time I have a classroom, I feel like I should build on the theme. What else could I add (for REALLY cheap)?

-Jamie

0

panda bag

Morning all! Thought I’d share another present that I made for Christmas. I’ll take a break from the presents for awhile then, but I do have some more to share – need to get photo editing!

My beautiful niece (featured here) absolutely loves Pandas. She’s almost three years old, and already has a large collection of panda teddy bears – like 8 of them!

I thought it would be fun to make something panda, that isn’t a stuffed animal – I like useful projects. So after a number of web searches, here’s what I came up with:

craft-2016-11-28-043

Isn’t it cute? I didn’t get a picture of her with it, because it took a while for her to warm up to it – Christmas was mostly about the presents that could immediately be played with, but eventually, she decided she liked it!

I made it out of inexpensive cotton broadcloth, and added the eyes and nose applique style. I almost didn’t stuff the ears, but I’m sure you’ll agree, stuffing them was definitely the way to go!

craft-2016-11-28-047

This was another project that I couldn’t find a pattern for, so I found a panda clipart file that I liked, and traced the eyes, nose and ears to get a nice shape. I used a bit of trial and error to get the bag right, but now it’s just perfect for holding a few toys.

If I can find the pattern pieces, I may be able to share the pattern, if anyone is interested – ask and we’ll see what I can do!

-Jamie


1

bow-tie bibs (and tinkle tents)

Hello everyone! Today is a very special day, because this little dude – my gorgeous nephew Isaac – is turning one today! Happy birthday, dude!

isaac

I thought a good way to celebrate would be to share the gifts that I made for him a year ago when he was first born. One of the things I sent for him was the playmat I shared with you earlier this week, but I also made a couple of other little things!

While I was searching for ideas of things to make, I saw some cute bibs with bow ties and though they were totally adorable. I didn’t necessarily like the ones I found online, so I came up with my own patterns for them.

bow-tie-bib

The bibs and bows are 100% cotton, and have lovely, soft combed cotton on the back. I used a black check and yellow dot pattern and the bows are alternate colour to the bibs. I think they are totally cute! What do you think?

I also, as kind of a funny gift, I decided to make some of these:

peepee-teepee

These are called ‘tinkle tents’ or ‘pee-pee tee-pees’. Whatever you call them, they are cute and funny! I used the leftover fabric from the bibs to make them. If you’ve been around baby boys, then you know exactly what they are for! They certainly got a good giggle from the family!

Well that’s all for today! Looking forward to all the celebrations this weekend, and then being able to share what I’ve made him for his first birthday!

-Jamie

1

more playmats

Morning!

Wanted to share a couple of projects that I did a while ago again. One was a gift for a baby born just before Christmas, so I didn’t share it sooner.

If you’ve been following my blog for awhile, you may remember that I made my niece a playmat for her first birthday. I was really pleased with how it worked, so I ended making a few other ones for other babies. I’m sure I’ll make more in the future, too – it’s a nice project, doesn’t take too much time, and is, hopefully, very useful.

They are a bit different, one to another, so I’ll tell you a bit about each in the order I made them.

isaac-playmat

This mat was made for my nephew, Isaac.
It’s 100% cotton (poplin for the patterned section and combed on the back). His dad (my brother) is completely obsessed with cars (more 4x4s and old cars) and my hubby actually found the fabric on one of the rare times I dragged him along to my favourite UK fabric store.

This is the only mat I’ve used any batting for. It has very thin (3-4mm) polyester batting throughout the middle section. It was something I decided to try, and although it’s slightly softer, I decided it probably wasn’t entirely necessary.

benjamin-playmat

This mat was for my friend’s son.

It was the first sewing project I finished in Canada. I did it even before I bought my new machine – I had borrowed my mom’s machine for a while, because she doesn’t like sewing and wasn’t going to use it!

This mat is made entirely out of flannel. It’s beautifully soft. I found a new shop, Overseas Fabric, that has an amazing fabric selection, especially their flannels, which are ridiculously well priced, too! I picked this print because it felt a little bit ‘Canadian-y’ and thought it would remind our friends of us! Awww!

Well, I think that’s it for today! Come back Thursday for a special blog post!

-Jamie

2

mani the whale

Hello again! Thanks for reading today – makes me feel great, knowing that someone actually wants to read what I’ve written.

Anyway…  I’ve been sewing. And loving it! I must tell you all about my new sewing machine sometime. Remind me if I forget. But this is about some sewing I did before Christmas.

I can’t remember whose blog said it, but someone said that it’s always hard sharing sewing projects around Christmas, because so many of the presents are gifts, and obviously you don’t want people to know what you’ve got them… And this year, I decided that I was going to make presents for my niece and nephews, rather than buying them – much more fun for me, and hopefully, something a bit more special for them. This is one of those projects, and I can finally share it, because Christmas has passed.

A while ago my SIL was talking about a denim whale she saw on Pinterest that she loved and hoped someone would make for her kids. I filed the idea away, because I had NO idea what to make for my ten-month old nephew. I wanted to make him something, but something that would last, not a toy for a ten-month old.

So here it is:

Craft 2016-11-28 023.JPG

I roughly (as usual) used a pattern that another blogger had provided (Thanks Lacey from ‘all my friends are flowers’!) I couldn’t print the pattern, because my computer wasn’t working, so I traced it on my ipad, so the size isn’t the same, and I wanted the front to have a bit more texture, so I broke the pattern up a bit. I also added some stitching to the fins and tail to give them a bit more 3d shape. But the pattern worked great, and I’m super happy with the result!

Craft 2016-11-28 030.JPG

I ended up not having any jeans that could be cut up (having just moved across the world), so I ended up going to the thrift store to find the cheapest ones possible – why not? Randomly, the cheapest jeans were a pair of light denim Armani jeans, and thus, Mani the Whale was born.

The only really tricky part of Mani was the top-stitching to give him a lip. I (stupidly) decided that if I was going to top stitch the lip, that was a good place to close him as well, so I didn’t have to try to hide stitches elsewhere. WRONG! It took so, so, so many pins to hold the stuffing back enough to get him into my machine… There was some blood. Mine, not Mani’s. And I had to enlist a helper (thanks hubby) to help feed him through the machine.

But he’s done, and he’s amazing. And, most importantly, loved by his new family!

craft-2016-11-28-022

-Jamie

0

applique tote bags

Hey, it’s me again. I know, I know – it’s been ages.

But I’m back…

And, very exciting, this is my 100th blog post. Only took me three years to get here. Let’s celebrate.

fireworks

Okay, that’s enough!

I’m very excited about some of the projects I’m going to share with you. In fact, I’m going to write 5 (!) posts today. Which is obviously because I’m dying to share things with you, rather than because I know otherwise it will be ages before I blog again.

So, today’s project to share: personalised tote bags.

When I was leaving my job in the UK, I decided I wanted to do something special for the amazing ladies that I was working with. One thing, as a teacher, that I never have enough of is tote bags. I am (was) forever carrying work back and forth, and there’s nothing as nice as a cute bag to carry things in. So I thought I would make my three colleagues (my year group team) matching personalised tote bags. First, I found out the favourite animal of each of them, then I created these:

craft-2016-07-13-002

The bags are 100% cotton and are fully lined, with French seams (luxury!), and I even managed to get my bluedaisyz labels into them.

I cut out each of their favourite animals, then cut it out on cotton poplin ironed onto medium interfacing. Then I attached them to the front of each bag.

applique-closeups

As a final challenge to myself, I figured out how to sew the handles on with the box and cross, making sure I didn’t go over my seams twice – tricky! Didn’t get a closeup picture of that, though.

3-bags

Anyway, I’m please with how they turned out. Even had some other friends wanting me to make one for them, as well! I made one for me, too (needed to do a trial bag), but didn’t take pics of it, for some reason. It has an elephant on it, as well, but it’s a different, more cartoon-y elephant. I think it’s cute.

By the way, if anyone was wondering – dolphins are horrible to sew around – too many intricate shapes.

What do you think? What would go on the front of your bag?

-Jamie

0

nintendo mushroom card

I was looking through photos of old projects the other day (now that I have access to the images on my computer again) and I saw this cute little card I made for my brother-in-law last year.

I rarely make cards, but enjoy it when I do – I suppose I need to make more cards. The problem is, I always want the perfect card for the person, not just any old nice card, which means I would have to custom make each card for each occasion. I should though… they turn out great!

My brother-in-law likes games and things like that, which I know virtually nothing about, so I decided to go old school gaming (by which I mean back to my own childhood). What do you think?

dsc_7506dsc_7517

dsc_7513

-Jamie